본문 영역
TIP Quick Setup Guide
- Download on Mong9 Editor for TinyMce Github.
- Upload the
mong9-editorfolder to the~/pluginsfolder. - Copy and paste the required JavaScript and stylesheet between <head> and </head>.
- Modify the JavaScript code on the TinyMceusage page.
TinyMce4 Sample
Installation Guide
1. Download the Mong9 Editor plugin file, and extract it on your computer.
After extracting, a folder named tinymce4-plugin-mong9-editorwill be created.
Rename the folder to mong9-editor
2. Connect to the server using an FTP client or other file transfer method.
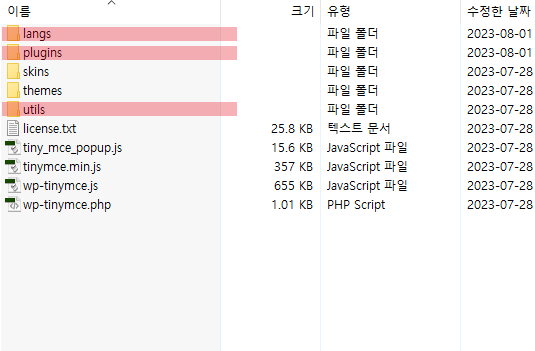
If you see folders like /langs, /plugins, /utils as shown above, you're in TinyMce4's top (root) directory.
Finding this top directory is important
3. Upload the mong9-editor folder to /plugins folder.
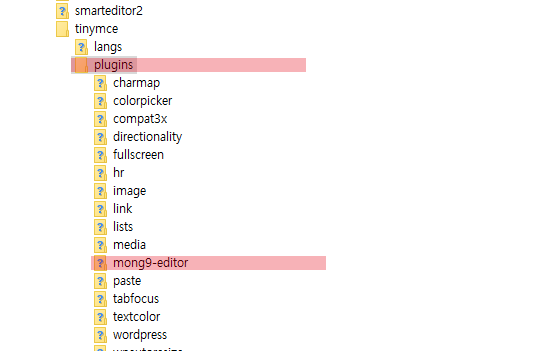
Mong9 Editor is a plugin, so upload it in the /plugins folder.
Place the mong9-editor folder inside /plugins folder, like in the image above.
4. Insert necessary JavaScript and stylesheets between <head>~</head>.
The code above is the files needed for the document created by Mong9 Editor. Insert it on every page of your homepage.
Please modify the M9_SET['mong9_url'] variable to suit your site.
5. Modify the JavaScript code on the TinyMce4 usage page.
This source is added when running TinyMce.
Caution
web editors make you crate document easily, but they also allow code changes, which could lead to security risks.
It is possible to intentionally insert malicious code and malicious links.
To prevent this, limit usage to trusted individuals, like administrators
When printing documents created with Mong9 Editor,Use the Mong9_Html_Convert()
content-filter.php filters the main content.
Mong9_Html_Convert() function uses the HTMLPurifier PHP library filter.
This library helps remove malicious code.